Sandi Berg
You may have seen articles claiming that schools are taking analog clocks off the walls because students can’t read them. This has caused some controversy.
Let’s look at some of the arguments from both sides:
• Students always have their phones with them, and the phones display digital clocks. This is often true—but not always. Some students (and adults) don’t have cellphones. Also, though most phones display a digital clock, you can set up your phone to display an analog clock. Therefore, we should say that many (not all) students have a phone that displays a digital clock.
• Learning how to read an analog clock teaches students how to skip count. Yes, reading an analog clock certainly helps build the skill of skip counting. Even better would be if teachers focused on multiplication rather than adding—one five, two fives, three fives—as that aligns better with the numerals on the clock.
• Learning how to read an analog clock teaches students about base 60. True—if a teacher has talked about that concept. It also teaches students about base 13—think about a 24-hour clock.
• If students can read an analog clock, they will be able to read airline tickets. Yes, students should know how to read a 24-hour clock and be able to convert between the two systems. However, neither a digital clock nor an analog clock necessarily teaches that skill (unless the clock displays 13:00, 14:00 and so on).
These are just a few of the arguments for and against teaching students how to read an analog clock. I don’t know how much of a role they play in analog clocks being removed. Many of the clocks have been replaced simply because of old age. However, it ispossible that some have been taken down because students can’t read them. I haven’t had an opportunity to delve deeper into the stories, and they don’t influence me at all. My goal here is not to convince you either way.
The bottom line is that I will keep teaching students how to read both digital clocks and analog clocks. Why? Because it’s in the curriculum. In Alberta, reading clocks is addressed specifically in Grade 4. I am required to teach the topic. What type of clock students choose to display on their phone or to wear on their wrist is up to them.
So how do I teach students how to read clocks? The same way I teach everything—by starting slowly and using visuals. This is not a separate unit that you dedicate a week to in January. Start right away, in September, but go slow—very slow.
Activity 1
You can start this activity with students at the beginning of the school year.
First, find a clock from which you can remove the inside circle (the part the numbers are written on) (Figure 1).
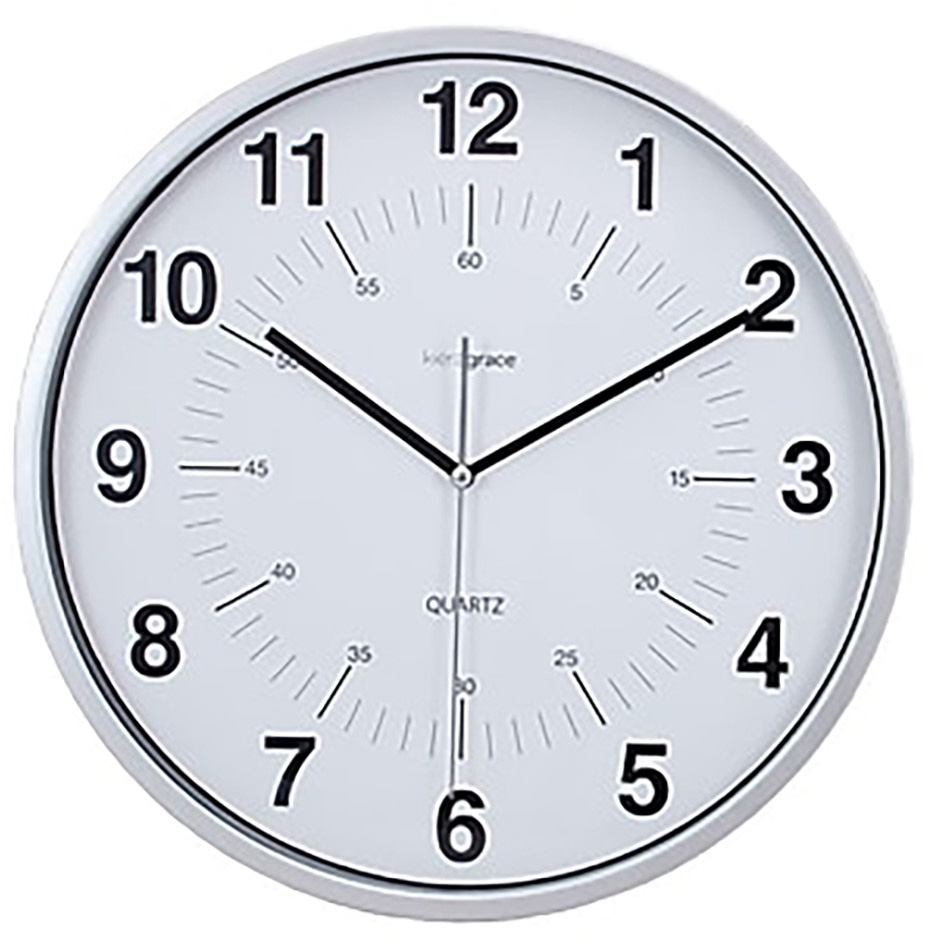
Remove the inside circle. You can either do the next step on that same circle or trace the circle to create a new circle and write only the numbers 1–12 on it. I prefer to use a fresh circle so that the other numbers, which are not needed yet, are not displayed.
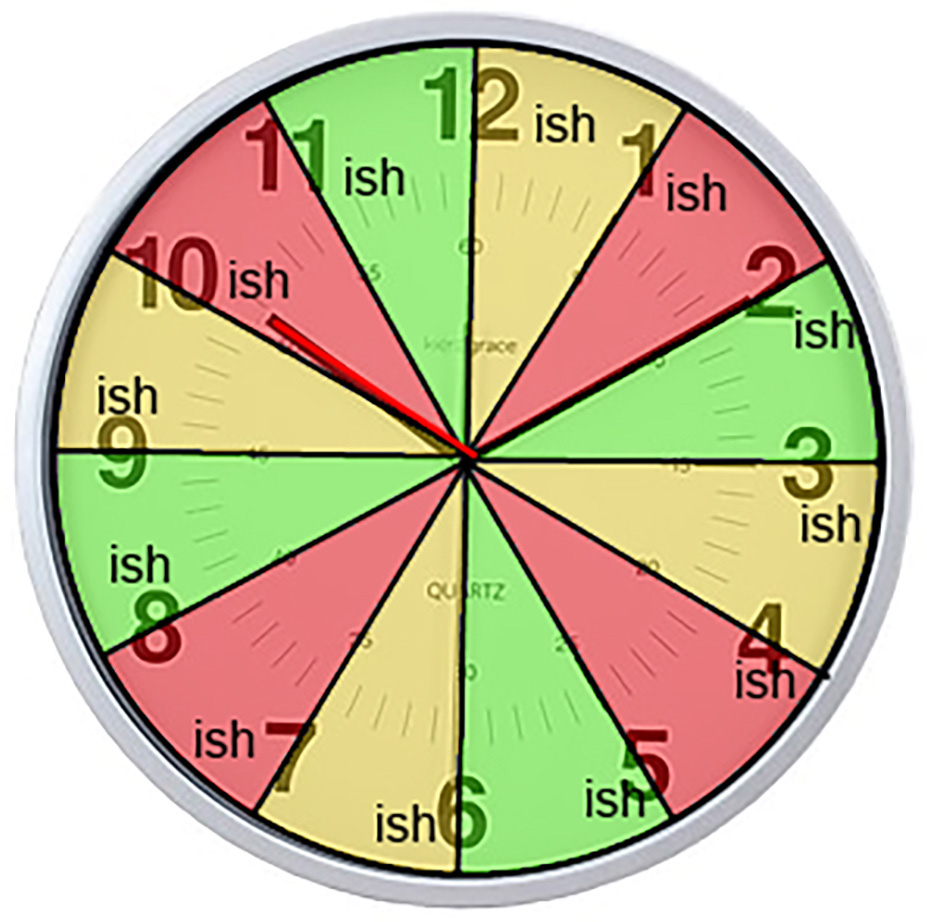
Draw a line from the centre of the circle to each of the numbers (1–12). This will create pie shapes. Shade the sections in three different colours. Write -ish next to each number (Figure 2).
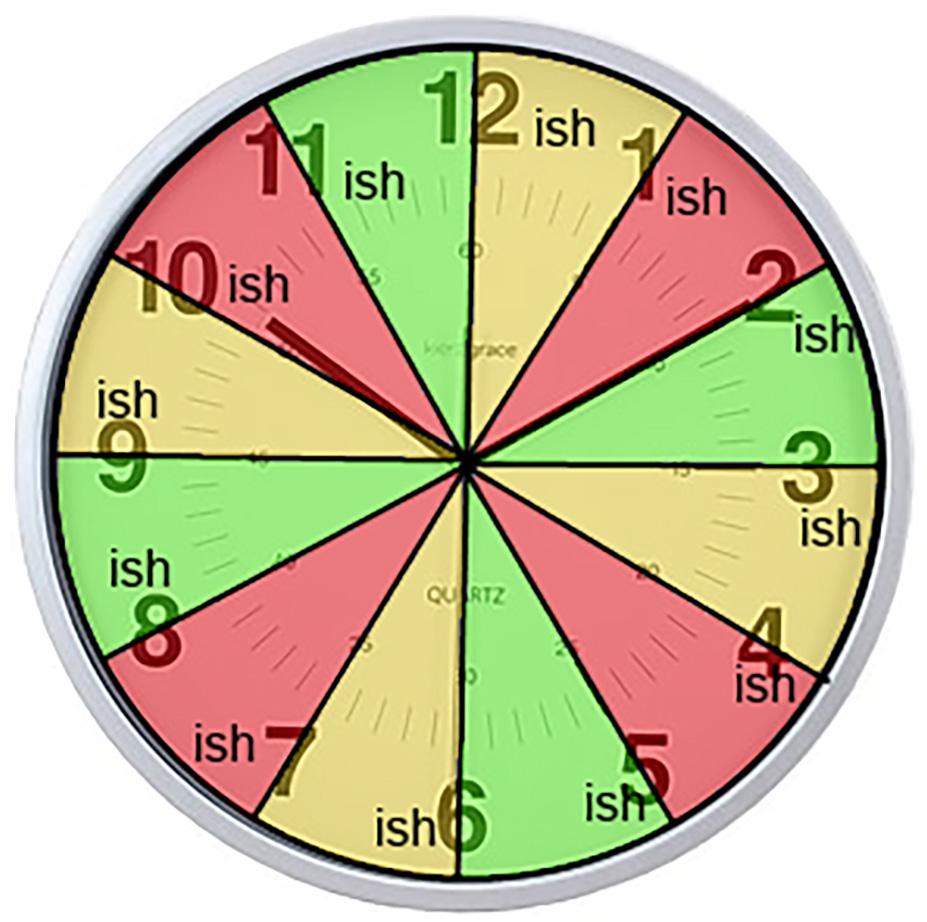
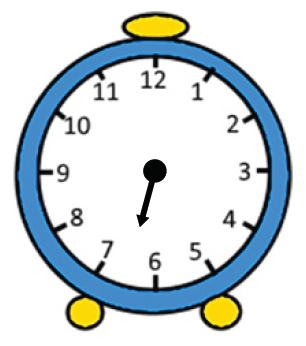
Now, if possible, remove the minute hand and the second hand from the clock. If you can’t do that or don’t want to, colour the hour hand so that it stands out (Figure 3).
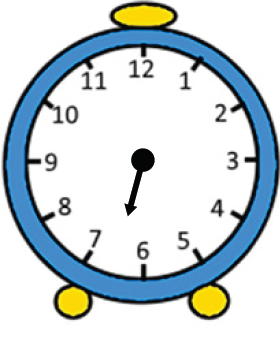
You may even want to draw arrows between the numbers (Figure 4).
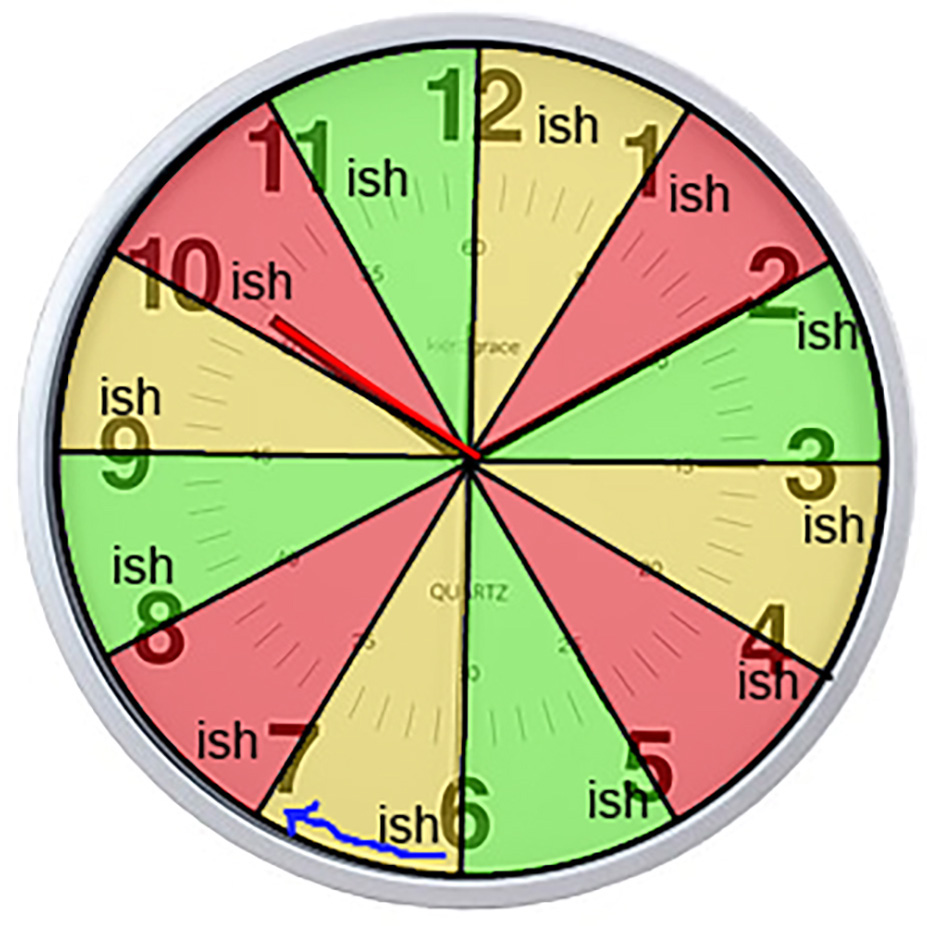
Give students a mini-lesson on how to read this clock. The clock shows that it’s 10ish. Go through a few different times. What would 4ish look like?
Yes, it’s not very specific. After a while, you can say something like, “It’s 2ish—almost 3.”
Do this for two weeks, three weeks, four weeks—however long it takes. Do not rush through. You have all year to teach students how to read a clock. Once they are comfortable, you can move on to the next activity.
Activity 2
Did you know that you can tell what time it is within about five minutes even without the minute hand? Want to try it out? Go ahead and order the clocks in the image below (Figure 5).
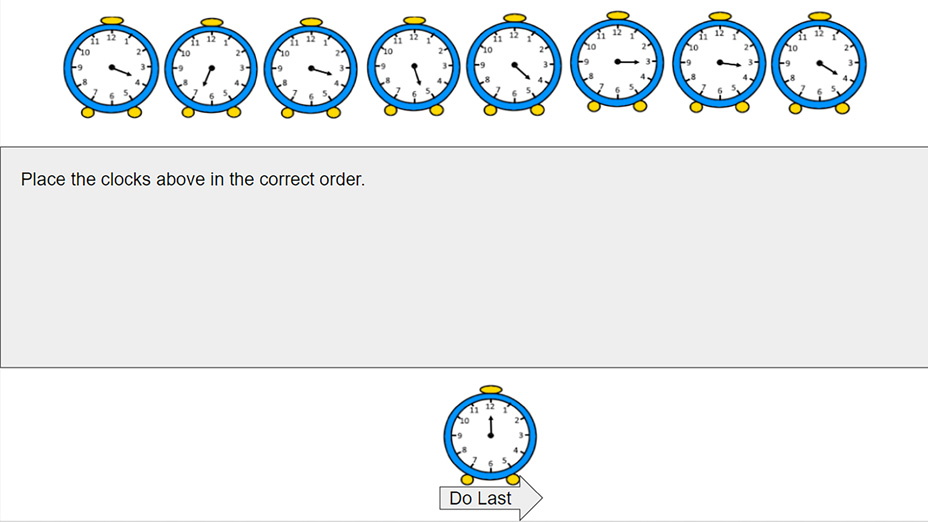
You’ll notice that one clock is at the bottom, by itself. During the activity with students, this clock is sorted with the others. While you are doing the activity, feel free to consider this clock either while sorting the rest of the clocks or afterward. Later, I’ll talk about how I address the clock with students.
Now, match the following times with the clocks:

Now, I’ll explain the process I use with students. The materials for this activity are in Appendix A.
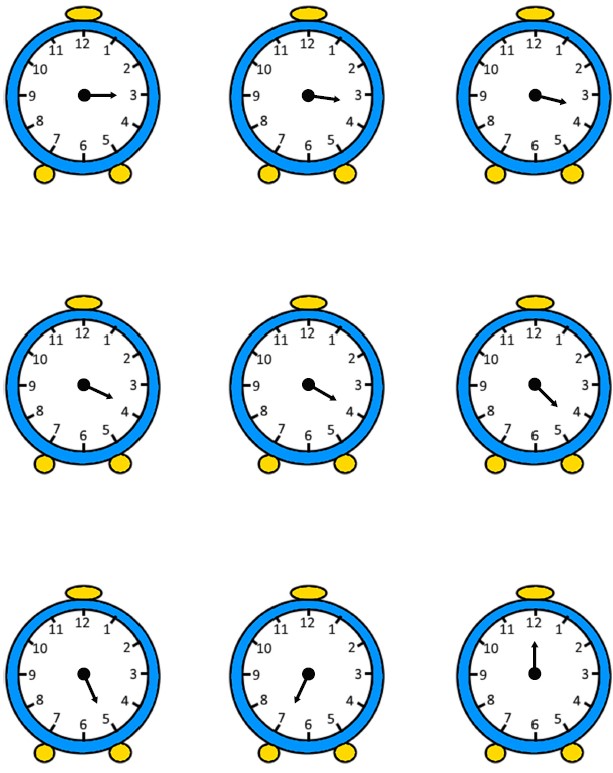
I hand out pictures of nine clocks on which only the hour hand and hour numbers (1–12) are displayed (see page 50). These are the same clocks as in Figure 5. They are separated so that students can move them around.
In pairs, students sort the clocks into the correct order by time.
Once they are done, the pairs meet with other pairs and compare their answers, share their reasoning and move the clocks around some more (if they choose).
I then open up my Google Slides version and display slide 2 (not in presentation mode).1 This slide shows eight clocks at the top and one at the bottom (as in Figure 5). I have one student come up and move a clock into the grey box. Then, another student comes up and places a clock either before or after the first clock. The students then explain how they know where each clock goes.
We repeat this process for all the clocks until we finally get to the clock at the bottom. Where does this clock go? I ask a student to come up and place it. I then ask, “Who else placed that clock here?” and “Who placed it in a different spot?” If a student chose a dif-ferent spot, I have him or her come up and show us where. Then I say, “Interesting. We have two different answers. Talk to your partner. Which do you agree with and why?” The discussion then focuses on the question of where the clock displaying 12 o’clock goes. Both spots!
Now, I distribute the time statements (see page 51). Students then match these with the clocks. They com-pare their answers with those of a different group, and then we discuss the answers as a class.
The handout on page 52 is for an activity that stu-dents will complete individually. Use this activity as a formative assessment to inform your teaching practices.
When you are talking about time with students, use the type of phrasing that is used in the time state-ments provided here. Again, don’t rush this. Don’t worry about using precise times yet (for example, you’ll notice that none of the examples refer to times like 3:15).
Activity 3
Moving on to minutes? Don’t refer to minutes at first. Instead, give students a picture of a clock with the hour numbers displayed and tick marks for min-utes. Have them count the tick marks around the clock. What patterns do they notice?
Do they notice that the tick marks are in groups of five? Have students re-count around the circle, and talk them through the process: “One, two, three, four, five. That’s one group of five. Notice that we’re now at the 1 on the clock. One, two, three, four, five. That’s two groups of five. Notice that we’re at the 2. How many minutes is that? Ten minutes. Interesting. Does that always work? Keep checking. One, two, three, four, five. That’s three fives. Fifteen minutes.” Stu-dents then figure out the rest. Now you’re making a connection to multiplication.
Spend time working with students on naming regular times (for example, 3:15, not quarter after).
Activity 4
Have students draw a circle and break it into quar-ters. What do they notice about how this relates to the clock? If they imagine the lines going from 12 to 6 and from 9 to 3, they can make the connection to quarter after.
Make sure to talk about the concept of 15 minutes out of 60 minutes (15/60) and so on.
Activity 5
Ready to add seconds? Have students figure out how high they can count in one minute. Time it ac-cording to just the minute hand. (If possible, use a clock that doesn’t have a second hand and that has a really obvious shift from minute to minute.) Students count in their head and then share their results. Some will count really fast, and others, really slow. That’s OK. Talk about how we have decided to set a standard counting speed for time to help us be consistent. (It was humans who decided that there are 60 seconds in a minute.) Show students a clock with a second hand and tick marks indicating minutes. Then have them count again. As they count, have students focus on the second hand as it passes each tick mark. When they share their results, they will probably be more consistent now.
Now that the students have done this activity, give them their own clock with tick marks to look at. What relationships can they find between the second hand, the minute hand and the hour hand? They might say that the hour hand is shorter and the second hand is longer. The longer the hand, the faster it moves—60 seconds in a minute and 60 minutes in an hour.
Give students a puzzle: “If I count to 60, that’s one minute. How would you figure out how many minutes it would take me to count to 180?” Some students may argue that it will take longer than three minutes. Why? Because it takes longer to say one hundred seventy-nine than it takes to say one. Don’t discount those arguments—they are absolutely correct!
I cannot stress this enough—when teaching stu-dents how to read a clock, go slow. Build understand-ing. Don’t move on until students understand what’s going on. You have all year.
Question for Self-Reflection
How do you help students understand the concept of time? That is, how do you help them with not just reading a clock but with actually understanding what time is?
Appendix A: Reading Clocks Activity
Materials
• Clock printouts (one page per group of two students)
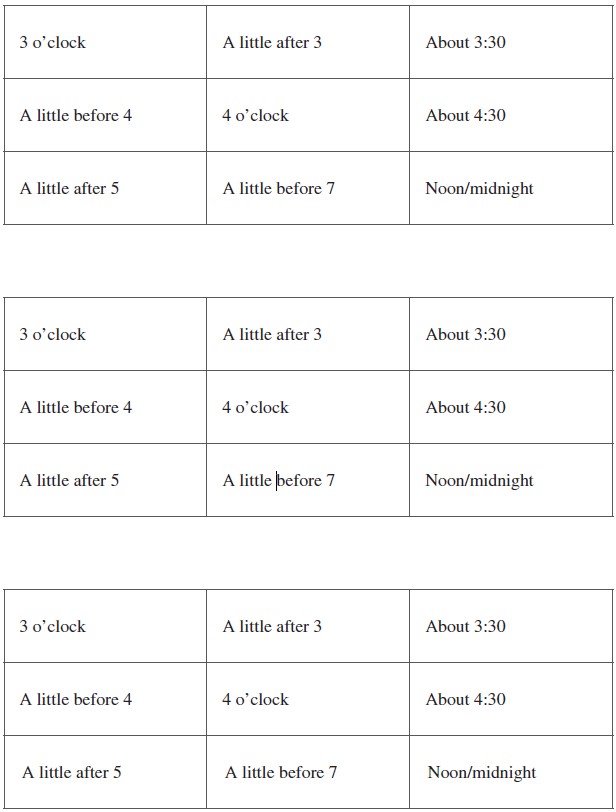
• Time statements (one set per group of two students—each page has three sets)
• Blank clocks worksheet (one worksheet per student—each page has two worksheets)
• Smart Notebook file (available at https://educationaljourneyofatechnobabe.blogspot .com/2019/03/do-we-have-time-for-this-analog-clocks.html)
Instructions
- Print out the page of clocks and cut out the clocks so that each group of two students has nine individual clocks.
- Print out the time statements and cut the statements apart so that each group of two students has nine individual time statements. (The page contains three sets of time statements. Each group needs only one set.)
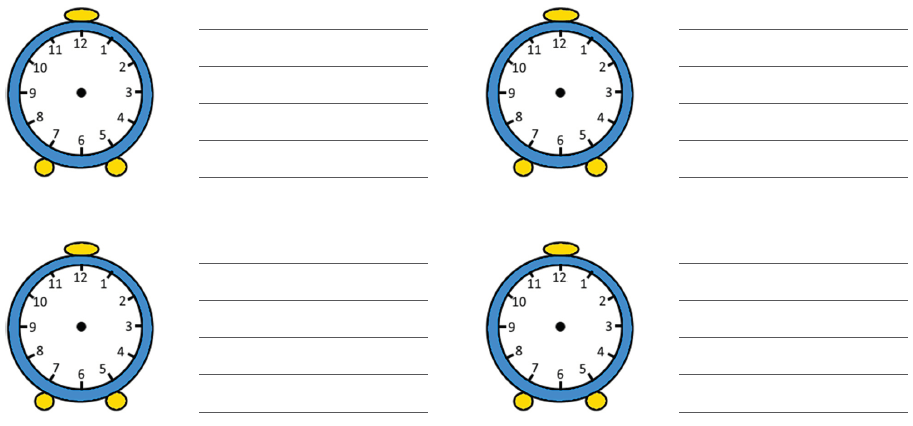
- Print off the worksheet and cut it so that each student gets half a page.
- Hand out the clock cut-outs.
- Ask students to order the clocks based on the times shown. Give them time to work. This is an oppor-tunity for you to see what they understand about time. Do they understand that the placement of the hour hand can help them make a decent guess about the time? Where did they put the clock displaying 12 o’clock—at the start or at the end? Do not guide students. Watch them work, but do not interfere.
- • Ask students to share how they decided to order the clocks. What was their process? Students can use page 1 of the Smart Notebook file to help.
- After discussion, hand out the time statements. Have students match the statements with the clocks.
- Ask students to share how they did their sorting. They can use the Smart Notebook file to help them explain.
- After discussion, hand out the worksheets. Ask students to choose four activities they do at differ-ent times throughout the day. They must use each of the phrases a little before, a little after, about and at __ o’clock exactly once. Have them draw the time on the clock, using only the hour hand.
Choose four activities you do at different times throughout the day. Use each of the phrases a little before, a little after, about and at __ o’clock exactly once. Draw the time on the clock using only the hour hand. Describe the activity using the time.

Choose four activities you do at different times throughout the day. Use each of the phrases a little before, a little after, about and at __ o’clock exactly once. Draw the time on the clock using only the hour hand. Describe the activity using the time.
Note
- The Google Slides presentation (as well as instructions, handouts and a Smart Notebook file) is available at https://educationaljourneyofatechnobabe.blogspot.com/2019/03/do-we-have-time-for-this-analog-clocks.html (accessed August 13, 2019).
Sandi Berg, a dedicated math junkie, loves finding, creating and sharing ideas and activities that build conceptual understanding of K–12 math outcomes. She is currently a learning services coordinator with Chinook’s Edge School Division.
A version of this article was originally posted at https://educationaljourneyofatechnobabe.blogspot.com/2019/03/do-we-have-time-for-this-analog-clocks.html on March 30, 2019.